




사용자 정의 인증

이전 페이지

이전 페이지 내용에 이어서 진행합니다.
Code

Preview
1.
로그인 화면
2.
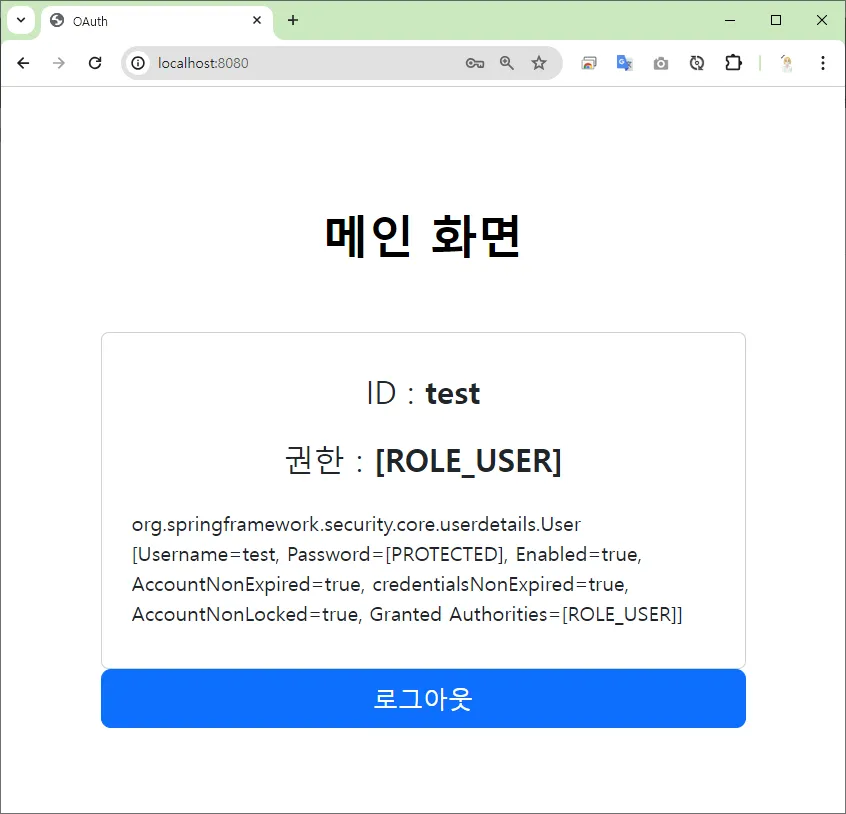
메인 화면
작업 프로세스
1.
프로젝트 생성
2.
프로젝트 설정
3.
도메인
4.
서비스
5.
스프링 시큐리티 설정
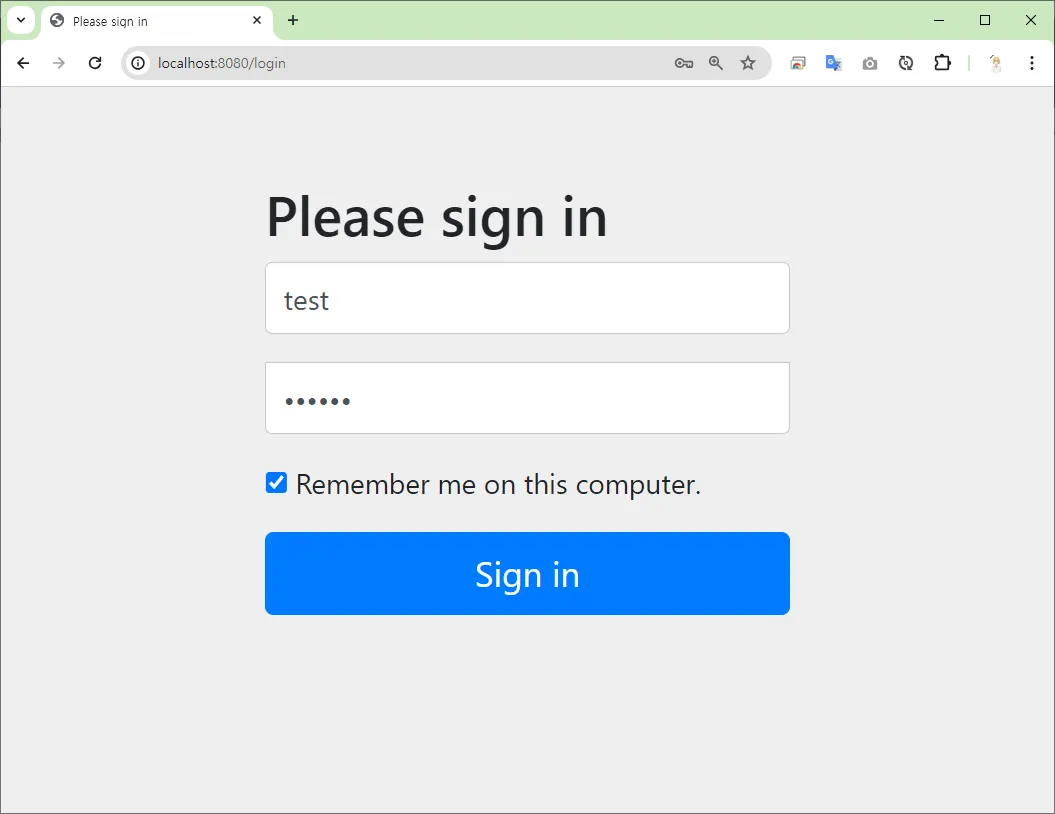
Preview
로그인 화면
메인 화면
프로젝트 생성
 프로젝트 생성 (이전 페이지)
 build.gradle
 spring boot 3.x.x spring security 6.x.x
plugins {
id 'java'
id 'war'
id 'org.springframework.boot' version '3.3.5'
id 'io.spring.dependency-management' version '1.1.6'
}
group = 'com.aloha'
version = '0.0.1-SNAPSHOT'
java {
toolchain {
languageVersion = JavaLanguageVersion.of(17)
}
}
configurations {
compileOnly {
extendsFrom annotationProcessor
}
}
repositories {
mavenCentral()
}
dependencies {
implementation 'org.springframework.boot:spring-boot-starter-security'
implementation 'org.springframework.boot:spring-boot-starter-thymeleaf'
implementation 'org.springframework.boot:spring-boot-starter-web'
implementation 'org.mybatis.spring.boot:mybatis-spring-boot-starter:3.0.3'
implementation 'org.thymeleaf.extras:thymeleaf-extras-springsecurity6'
compileOnly 'org.projectlombok:lombok'
developmentOnly 'org.springframework.boot:spring-boot-devtools'
runtimeOnly 'com.mysql:mysql-connector-j'
annotationProcessor 'org.projectlombok:lombok'
providedRuntime 'org.springframework.boot:spring-boot-starter-tomcat'
testImplementation 'org.springframework.boot:spring-boot-starter-test'
testImplementation 'org.mybatis.spring.boot:mybatis-spring-boot-starter-test:3.0.3'
testImplementation 'org.springframework.security:spring-security-test'
testRuntimeOnly 'org.junit.platform:junit-platform-launcher'
}
tasks.named('test') {
useJUnitPlatform()
}
Java
복사
프로젝트 설정
application.properties
spring.application.name=form-custom
# 데이터 소스 - MySQL
spring.datasource.driver-class-name=com.mysql.cj.jdbc.Driver
spring.datasource.url=jdbc:mysql://127.0.0.1:3306/aloha?serverTimezone=Asia/Seoul&allowPublicKeyRetrieval=true&useSSL=false&autoReconnection=true&autoReconnection=true
spring.datasource.username=aloha
spring.datasource.password=123456
# Mybatis 설정
mybatis.configuration.map-underscore-to-camel-case=true
mybatis.type-aliases-package=com.aloha.security6.domain
mybatis.mapper-locations=classpath:mybatis/mapper/**/**.xml
Markdown
복사
도메인
•
Users.java
•
UserAuth.java
•
CustomUser.java
Users.java
@Data
public class Users {
private Long no;
private String username;
private String password;
private String name;
private String email;
private Date createdAt;
private Date updatedAt;
private int enabled;
private List<UserAuth> authList;
}
Java
복사
UserAuth.java
@Data
public class UserAuth {
private Long no;
private String username;
private String auth;
}
Java
복사
CustomUser.java
DB에서 조회한 데이터를 직접 정의한 사용자 및 권한 Users, UserAuth 객체로 매핑한 결과를 스프링 시큐리티의 사용자 정보 인터페이스인 UserDetails 를 구현하여 사용자 정의 인증 객체로 정의합니다.
@Getter
@ToString
public class CustomUser implements UserDetails {
// 사용자 DTO
private Users user;
public CustomUser(Users user) {
this.user = user;
}
/**
* 🔐 권한 정보 메소드
* ✅ UserDetails 를 CustomUser 로 구현하여,
* Spring Security 의 User 대신 사용자 정의 인증 객체(CustomUser)로 적용
* ⚠ CustomUser 적용 시, 권한을 사용할 때는 'ROLE_' 붙여서 사용해야한다.
*/
@Override
public Collection<? extends GrantedAuthority> getAuthorities() {
return user.getAuthList().stream()
.map( (auth) -> new SimpleGrantedAuthority(auth.getAuth()) )
.collect(Collectors.toList());
}
@Override
public String getPassword() {
return user.getPassword();
}
@Override
public String getUsername() {
return user.getUsername();
}
@Override
public boolean isAccountNonExpired() {
return true;
}
@Override
public boolean isAccountNonLocked() {
return true;
}
@Override
public boolean isCredentialsNonExpired() {
return true;
}
@Override
public boolean isEnabled() {
return user.getEnabled() == 0 ? false : true;
}
}
Java
복사
서비스
•
UserDetailServiceImpl.java
UserDetailServiceImpl.java
UserDetailsService 인터페이스를 구현하여, 사용자 정보를 로드하는 방법을 정의할 수 있습니다.
/**
* 🔐 UserDetailsService : 사용자 정보 불러오는 인터페이스
* ✅ 이 인터페이스를 구현하여, 사용자 정보를 로드하는 방법을 정의할 수 있습니다.
*/
@Slf4j
@Service
public class UserDetailServiceImpl implements UserDetailsService {
@Autowired
private UserMapper userMapper;
@Override
public UserDetails loadUserByUsername(String username) throws UsernameNotFoundException {
log.info(":::::::::: UserDetailServiceImpl ::::::::::");
log.info("- 사용자 정의 인증을 위해, 사용자 정보 조회");
log.info("- username : " + username);
Users user = null;
try {
// 👩💼 사용자 정보 및 권한 조회
user = userMapper.select(username);
} catch (Exception e) {
e.printStackTrace();
}
if( user == null ) {
throw new UsernameNotFoundException("사용자를 찾을 수 없습니다." + username);
}
// 🔐 CustomUser ➡ UserDetails
CustomUser customUser = new CustomUser(user);
return customUser;
}
}
Java
복사
스프링 시큐리티 설정
•
SecurityConfig.java
SecurityConfig.java
UserDetailsService 빈을 메소드로 정의하는 방식에서, @Service 클래스를 정의한 사용자 정의 인증 설정을 하는 방식으로 전환한다.
이전 방식 (AS-IS)
적용 방식 (TO-BE)
•
UserDetailServiceImpl 의존성 주입
•
사용자 정의 인증 설정
UserDetailServiceImpl 의존성 주입
@Autowired
private UserDetailServiceImpl userDetailServiceImpl;
Java
복사
사용자 정의 인증 설정
// ✅ 사용자 정의 인증 설정
http.userDetailsService(userDetailServiceImpl);
Java
복사
SecurityConfig.java
@Slf4j
@Configuration
@EnableWebSecurity
public class SecurityConfig {
@Autowired
private DataSource dataSource;
@Autowired
private UserDetailServiceImpl userDetailServiceImpl;
// 스프링 시큐리티 설정 메소드
@Bean
public SecurityFilterChain securityFilterChain(HttpSecurity http) throws Exception {
// ✅ 인가 설정
http.authorizeRequests(requests -> requests
.antMatchers("/**").permitAll()
.anyRequest().permitAll()
);
// 🔐 폼 로그인 설정
// ✅ 커스텀 로그인 페이지
http.formLogin(login -> login.permitAll() );
// ✅ 사용자 정의 인증 설정
http.userDetailsService(userDetailServiceImpl);
// 🔄 자동 로그인 설정
http.rememberMe(me -> me.key("aloha")
.tokenRepository(tokenRepository())
.tokenValiditySeconds(60 * 60 * 24 * 7));
return http.build();
}
/**
* 🍃 비밀번호 암호화 빈 등록
* @return
*/
@Bean
public PasswordEncoder passwordEncoder() {
return new BCryptPasswordEncoder();
}
/**
* 🍃 AuthenticationManager 인증 관리자 빈 등록
* @param authenticationConfiguration
* @return
* @throws Exception
*/
@Bean
public AuthenticationManager authenticationManager(
AuthenticationConfiguration authenticationConfiguration ) throws Exception {
return authenticationConfiguration.getAuthenticationManager();
}
/**
* 👮♂️🔐 사용자 인증 관리 빈 등록 메소드
* JDBC 인증 방식
* ✅ 데이터 소스 (URL, ID, PW) - application.properties
* ✅ SQL 쿼리 등록
* ⭐ 사용자 인증 쿼리
* ⭐ 사용자 권한 쿼리
* @return
*/
// @Bean
// public UserDetailsService userDetailsService() {
// JdbcUserDetailsManager userDetailsManager
// = new JdbcUserDetailsManager(dataSource);
// // 사용자 인증 쿼리
// String sql1 = " SELECT username, password, enabled "
// + " FROM user "
// + " WHERE username = ? "
// ;
// // 사용자 권한 쿼리
// String sql2 = " SELECT username, auth "
// + " FROM user_auth "
// + " WHERE username = ? "
// ;
// userDetailsManager.setUsersByUsernameQuery(sql1);
// userDetailsManager.setAuthoritiesByUsernameQuery(sql2);
// return userDetailsManager;
// }
/**
* 🍃 자동 로그인 저장소 빈 등록
* ✅ 데이터 소스
* ⭐ persistent_logins 테이블 생성
create table persistent_logins (
username varchar(64) not null
, series varchar(64) primary key
, token varchar(64) not null
, last_used timestamp not null
);
* 🔄 자동 로그인 프로세스
* ✅ 로그인 시
* ➡ 👩💼(ID, 시리즈, 토큰) 저장
* ✅ 로그아웃 시,
* ➡ 👩💼(ID, 시리즈, 토큰) 삭제
* @return
*/
@Bean
public PersistentTokenRepository tokenRepository() {
// JdbcTokenRepositoryImpl : 토큰 저장 데이터 베이스를 등록하는 객체
JdbcTokenRepositoryImpl repositoryImpl = new JdbcTokenRepositoryImpl();
// ✅ 토큰 저장소를 사용하는 데이터 소스 지정
// - 시큐리티가 자동 로그인 프로세스를 처리하기 위한 DB를 지정합니다.
repositoryImpl.setDataSource(dataSource);
// persistent_logins 테이블 생성
try {
repositoryImpl.getJdbcTemplate().execute(JdbcTokenRepositoryImpl.CREATE_TABLE_SQL);
}
catch (BadSqlGrammarException e) {
log.error("persistent_logins 테이블이 이미 존재합니다.");
}
catch (Exception e) {
log.error("자동 로그인 테이블 생성 중 , 예외 발생");
}
return repositoryImpl;
}
}
Java
복사
사용자 정보 가져오기
Principal vs Authentication vs User
사용자 정보를 가져오는 주요 인터페이스 및 클래스
다음은 Spring Security의 주요 인터페이스와 클래스의 구조도입니다
java.security.Principal (Interface)
↑
Authentication (Interface)
↑
UsernamePasswordAuthenticationToken (구현체)
↑
getPrincipal()
↳ org.springframework.security.core.userdetails.User
(implements UserDetails)
Java
복사
이 구조도는 Spring Security에서 사용자 인증 정보가 어떻게 계층화되어 있는지를 보여줍니다.
Principal은 최상위 인터페이스이며, Authentication은 이를 확장하여 더 많은 인증 관련 기능을 제공합니다. UsernamePasswordAuthenticationToken은 Authentication의 구현체 중 하나이며, getPrincipal() 메소드를 통해 UserDetails를 구현한 User 객체를 반환합니다.
이제, 사용자 정의 인증방식으로 사용할 CustomUser 객체로 유저 정보를 가져올 수 있습니다.java.security.Principal (Interface)
↑
Authentication (Interface)
↑
UsernamePasswordAuthenticationToken (구현체)
↑
getPrincipal()
↳ org.springframework.security.core.userdetails.User
↳ com.aloha.security6.domain.CustomUser
(implements UserDetails)
: Users (사용자 정보 객체)
Java
복사
여기서 사용자 정의로 사용할 객체를 CustomUser 로, UserDetails 을 구현하였습니다.public String home(@AuthenticationPrincipal CustomUser authUser, Model model) throws Exception {
if( authUser != null ) {
log.info("authUser : " + authUser);
Users user = authUser.getUser();
model.addAttribute("user", user);
}
return "index";
}
Java
복사
이제 세션에 등록된 CustomUser 객체에서 Users 객체를 가져와 등록된 사용자 정보를 바로 가져올 수 있습니다.
클래스/인터페이스 | 역할 | 주요 메서드 | 주요 구현체 |
Principal | 인증된 사용자의 기본 정보 제공 (표준 자바 인터페이스) | getName() | Spring Security의 User, 또는 사용자 정의 객체 |
Authentication | Spring Security 인증 정보 (사용자, 권한, 인증 상태 등 포함) | getPrincipal(), getAuthorities(), isAuthenticated() | UsernamePasswordAuthenticationToken, JwtAuthenticationToken |
User | 인증된 사용자의 세부 정보 제공 (Spring Security의 구현체, UserDetails를 구현) | getUsername(), getAuthorities(), isAccountNonLocked() 등 | Spring Security 기본 User 클래스 |
•
Principal: 최소한의 사용자 식별 정보를 제공.
•
Authentication: 인증 및 권한 관련 정보를 모두 포함.
•
User: Spring Security에서 사용자 세부 정보를 제공하는 구체적인 구현체.